
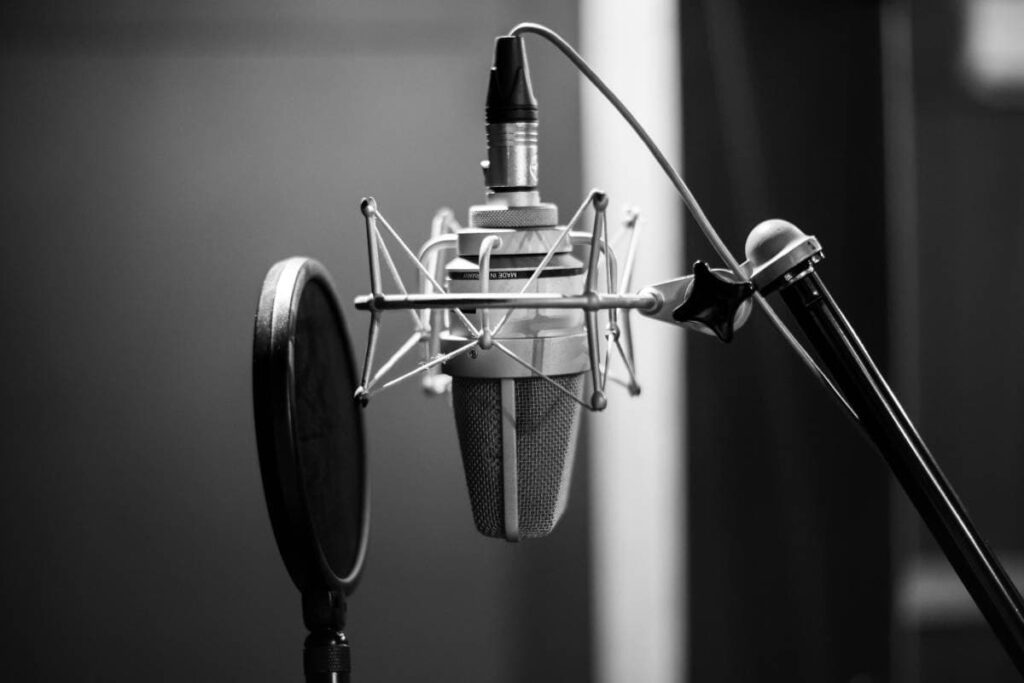
A crackling microphone can be annoying at best and nerve-wracking at worst, especially after spending hours creating the perfect recording, only to listen back to your finished work and hear the sound of a mic crackle popping up here and there.
Luckily, you can try a few approaches to reduce or eliminate mic crackling once you understand what causes it in the first place.
Here are eight reasons why your mic crackles:
- The contacts have become loose.
- The gain is set too high.
- The mic cable is faulty.
- Other electric appliances are running in the room.
- There’s electronic noise in the recording environment.
- The relative humidity is incredibly low.
- Mixing issues: EQ and limiter are not calibrated.
- There’s a loose or faulty microphone element.
Table of Contents
- Why Does My Mic Keep Crackling
- 1. The Contacts Have Become Loose
- 2. The Gain Is Set Too High
- 3. The Audio Cables are Faulty
- 4. Other Electric Appliances Are Running in the Room
- 5. There’s Electronic Noise in the Recording Environment
- 6. The Relative Humidity Is Incredibly Low
- 7. Mixing Issues: EQ and Limiter Are Not Calibrated
- 8. There’s a Loose or Faulty Microphone Element
- Alternative Solutions to Mic Crackles
- Final Thoughts
Why Does My Mic Keep Crackling
In the rest of this article, I’ll detail these eight common issues and a few quick, straightforward ways to fix them.
1. The Contacts Have Become Loose
Loose microphone contacts are a common issue in many recording scenarios. Poor sound quality, muffled voices, and constantly annoying crackles are all indicators of loose contacts somewhere down the line.
Crackling Sounds
It‘s a good idea to check the contacts on your microphone and gear often to ensure they are secure. How, you might ask?
- First, wiggle the XLR cable while speaking into your mic and see if it picks up any crackles.
- Next, wiggle other connected wires (3.5mm audio jack, headphone jack, power cords, and audio cables in your setup). Listen closely for any crackling as you speak.
- You may also disconnect all the cables connected from your mic to the amplifier or from the receiver to the amplifier. Insert each cable at a time and see if the crackling goes away or persists.
- Don’t forget to push the connectors in to be sure they are correctly connected.
Check for loose connections when recording and see whether your microphone starts to crackle. If you’re lucky, you won’t have to dig deeper to find the source of the problem.
2. The Gain Is Set Too High
Did you know an over-amplified signal could also cause your microphone to crackle and produce weird noises? This happens when the person recording has their gain set too high on the mic or their digital recording software.
Microphone Crackling
If a microphone’s gain is too high, the signal might be too powerful for your speaker to handle. Your amplifier will also add extra voltage to the loud input signal.
This often results in clipping of sounds in the recording, usually followed by distortion or a complete dropout of the audio.
Turn down the gain knob on your microphone and amplifier to avoid this. Keep the gain knob turned between 50-75%. Turning the gain up is never a good idea, as it often clips the signal when your recording gets too loud.
Remember: You can set your mic to no universally ideal gain level. Find out what works and what doesn’t by trying different levels until the crackling stops.
3. The Audio Cables are Faulty
Most of the time, faulty wiring in a microphone cable isn’t the main cause of a mic crackle.
After all, most high-quality XLR cables are made of Oxygen-Free Copper (OFC), plated gold connectors, and top-notch shielding to keep the external noise where it belongs – outside.
Crackling Noises
However, crackling sounds can be caused by substandard or damaged cables. If you move your equipment a lot, you might want to check your cables for damage:
- Look for corroded pins
- Look for torn shielding
- Look for strands of exposed wire
Faulty cables will almost certainly keep working for days, weeks, or months after damage. You can tell that your cable is damaged if it makes consistent crackling noises every time you move it.
Does the crackling noise get worse with time? If so, look for physical damage along the length of the cable, but more importantly, check the connectors.
And if you spot any significant damage, you must replace the cable. If the problem persists even with a new cable, it might be caused by something else – for example, the presence of an electromagnetic field somewhere in the vicinity of a faulty hardware preamp or power supply in your audio interface.
4. Other Electric Appliances Are Running in the Room
If loud machines run in the room while you are recording, they can create a lot of noise that the microphone picks up. This is true if your microphone is overly sensitive and can pick up every noise, no matter how seemingly small, from the sound of the fan blades spinning or the vibrations of a nearby device’s motor.
Additionally, moving parts can transfer electrical charges to the air. Your microphone then picks up these charges, sends them along with the signal, and interprets them as crackles by your speakers.
The best way to avoid this is to keep hairdryers, vacuum cleaners, and other machines away from your recording studio.
Furthermore, keep the room as quiet as possible. If you have no choice but to record in a noisy environment, try to position the microphone as far away from other machines as possible.
5. There’s Electronic Noise in the Recording Environment
Electronic noise refers to interference that travels through the air to your microphone.
It may be caused by nearby AC power lines, a power outlet, a faulty light fixture, a faulty appliance, or even a person using a cell phone close by.
Electronic noise is highly likely in any home recording studio where you may have poor grounding, disorganized wires, and a poor equipment setup. One way to reduce electrical interference is to keep your microphone, receiver, amplifier, and speakers away from high-voltage devices.
You can also use a ground lift switch on your audio interface.
Doing this eliminates ground loops; a ground loop is an unwanted electrical path occurring when two earthed points in the same circuit have different potentials.
A ground lift switch severs this unwanted connection and only allows for the equipment’s ground and shielding to share one common ground reference.
Electronic noise can be incredibly hard to remove from the track once it’s recorded. You’ll have to make sure to eliminate any sources of noise as soon as you notice them.
6. The Relative Humidity Is Incredibly Low
When the relative humidity dips below 40%, the air becomes dehydrated.
As a result, it loses the ability to drain electrical charges, making it easier for your microphone to pick up and amplify tiny sparks into crackling. This is especially common in the summer when there’s less rainfall.
Therefore, keeping the relative humidity in your home recording studio at higher levels (40% or above) is of the essence.
High humidity can help drain static electricity since water is a good conductor of electricity. If it helps, install a humidifier to keep the air moist.
7. Mixing Issues: EQ and Limiter Are Not Calibrated
Even if you’re using a clean microphone and following all the best practices above, you could still run into audio problems when mixing.
Inaccurately calibrated EQ and/or a clipped limiter setting can cause ugly-sounding audio. A clipped signal will appear in your track as a loud, harsh “chopped” soundwave.
Any sound above a certain volume will start to clip, which means that the peaks and dips of that sound are being cut off and can no longer be played by the speaker. High volumes cause an unnatural harshness in the sound, where you may also pick up some strange noises, including crackling.
Unfortunately, there’s no universal procedure for calibrating your EQ and limiter. For instance, a rock ‘n’ roll audience could benefit from clipping and distortion as the volume increases. On the other hand, a solo vocalist may sound awkward to the audience when their vocals are too distorted.
Each audience has its own needs. It’s up to you to find the best sound settings and avoid excessive clipping.
8. There’s a Loose or Faulty Microphone Element
Mics, amplifiers, and receivers are delicate devices. After years of use, they’re bound to develop some issues, such as:
- Blown fuses
- Damaged diodes
- Fried circuit boards, etc.
Moreover, if you always sign off the stage by dropping the mic, you expose it to unnecessary damage.
A loose microphone element is hard to see without close inspection.
One way to check for a loose element is by slightly shaking your microphone when turned off and listening closely for subtle vibrations. If a microphone element is loose or not attached properly, rapid movements and vibrations will cause the microphone to crackle.
Additionally, avoid accidentally bumping your microphone during recording by ensuring your microphone is firmly attached to its stand. If possible, use a shock mount to minimize the vibrations caused by the movement of your microphone arm.
Alternative Solutions to Mic Crackles
Even the best microphone will produce unwanted crackles and noises at some point in the recording process. These issues are even more common with cheaper mics, which often have noisy built-in electrical components that add crackling and hissing to the sound.
However, if you tried all the above solutions and nothing seemed to work, don’t fret! There’s still more you can do:
Use a Pop Filter While Recording
A pop filter is a device you place before your microphone to minimize plosive sounds.
It’s a piece of mesh or fabric that filters out the popping noises from plosive speech sounds like ‘p’ and ‘b.’ These sounds cause small bursts of air, which can be mistaken for low-pitched crackles. Pop filters come in different designs, so make sure you find one that’s easy to attach to your microphone stand.
Alternatively, you can make your own pop filter if you’re on a budget.
Switch to a Less Sensitive Mic
Condenser mics are great, but they are also very sensitive to any sounds nearby. They are designed to pick up sounds from one direction (unidirectional). Their sensitivity has much to do with their working mechanism (your voice vibrates two charged plates inside the mic, which induces a voltage into the system).
On the other hand, a dynamic mic captures sounds from all directions. They are less sensitive to sounds since they use coils and magnets to induce a voice signal into the sound system.
Consider switching to a dynamic microphone. Less sensitive mics may fail to pick up ambient noise as long as it is subtle enough.
Place Your Mic Closer to Your Lips
If the crackling isn’t overwhelming, you might want to try an easy fix – placing the microphone 2-3 inches (5 – 7.6 cm) from your mouth when recording.
A microphone far from your mouth is likelier to pick up ambient noise. Bringing it closer to your lips cleans up the signal and drowns out any crackling noises that may have been picked up.
Put Some Distance Between the Mic and the Speaker
As discussed before, other devices nearby can always introduce static in your microphone, and speakers are no exception. Unfortunately, that’s not the only concern.
You’ve probably heard the highly-pitched screech when speaking through the microphone close to the speakers.
This has a lot to do with microphone feedback. Here, your speakers amplify the mic’s signal, and the amplified sound travels back to the microphone. It then travels to the speakers again. This creates a loop that overloads the system. A loud screech follows shortly after.
The best way to avoid this problem is to put some distance between the microphone and the speaker. Move the mic a few feet away from the speaker to see if that solves the problem.
Reinstall Your Music & Recording Software
Faulty equipment does not always take the blame for a crackling microphone.
Sometimes, the software that you use to mix your recordings might be to blame. If this is the case, you might want to reinstall your DAW, music player, or any other voice recording software.
Buy a New Microphone
A defective microphone can cause microphone cracks.
If the diaphragm inside the microphone is broken, the microphone may get caught in a crackling state for the duration of the recording. This is usually because the microphone is dropped a few times or used too long.
If you use the same microphone for a long time, the diaphragm may get worn out, and the microphone may get caught in a crackling state.
But before you seal your mic’s fate, check the following:
- Are your equipment jacks, pins, and connectors firmly inserted into their sockets?
- Does a new microphone work fine with your old equipment?
- Is your equipment clean and dust-free?
- Are your sound settings correct?
If you answered yes to all these questions and still hear crackling, your mic could be faulty. In that case, consider buying a new microphone.
Final Thoughts
No matter why your microphone crackles, we’ve provided eight solutions to help you fix the problem. If one doesn’t work, move on to the next until you find a fix that works for you. And if all else fails, consider making audio enhancements or buying a new condenser mic and in-ear monitors.

- Review of the ALABS IRON MINI-WL: A Powerhouse Wireless Microphone - October 4, 2023
- What is a Saturator in Music Production: A Brief Explanation - May 11, 2023
- What Are Rotary DJ Mixers? An Overview - May 11, 2023
SoundStudiomagic.com is a participant in the Amazon Services LLC Associates Program, an affiliate advertising program designed to provide a means for sites to earn advertising fees by advertising and linking to Amazon.com. We also participate in other affiliate programs which compensate us for referring traffic.