
Many people have home stereo systems that only support traditional red and white RCA cables. Creating a custom aux cord that incorporates these connections can be convenient for those looking to connect their devices with aux input. Making an AUX cord with red and white connectors is simple, and it offers a way to repurpose old cables or customize the length to fit specific needs.
Making an AUX cord with red and white connectors requires purchasing a 3.5mm male aux end and some wire, preferably speaker wire, typically consisting of two insulated wires. A third wire will be needed for the ground, which can be obtained from an additional source. Once the necessary materials are gathered, it’s time to connect the wires to the aux ends, solder them, and use shrink tubing or braiding to secure the connections for a functional and well-made AUX cord.
Table of Contents
- Materials Needed
- Understanding AUX Cords
- Preparation
- Soldering the Wires
- Testing the Connection
- Tips and Safety Measures
- Conclusion
Materials Needed
You will need a few components and tools to make an AUX cord with red and white wires. These materials are essential to help ensure proper connection and audio transmission between devices.
Firstly, gather the following components:
- Red and white speaker wires
- Two 3-pin audio jacks
- Heat shrink tubing (optional)
In addition to these materials, you will also need a few essential tools:
- Wire stripper or scissors
- Soldering iron and solder (recommended but optional)
- Electrical tape
- Lighter or heat gun (for the heat shrink tubing, if used)
With these materials and tools, you will be well on your way to creating a custom AUX cord with red and white wires. In the following sections, you will learn assembling and connecting the audio cable. Following these steps, you can make a functional AUX cord for your audio needs.
Understanding AUX Cords
An AUX cord enables devices to transmit audio signals for amplification without needing digital conversion. These cords are commonly used to connect devices like smartphones, tablets, and laptops to external sound systems, amplifiers, or car stereos.
Analog Audio Signals
AUX cords carry analog audio signals, which differ from digital signals as they’re a continuous waveform. Analog signals can be subject to interference and a loss of quality but generally preserve the original audio’s warmth and fullness. Using an AUX cord to transmit audio, the signal remains analog throughout the entire process, ensuring an accurate representation of the original sound.
Red and White Connectors
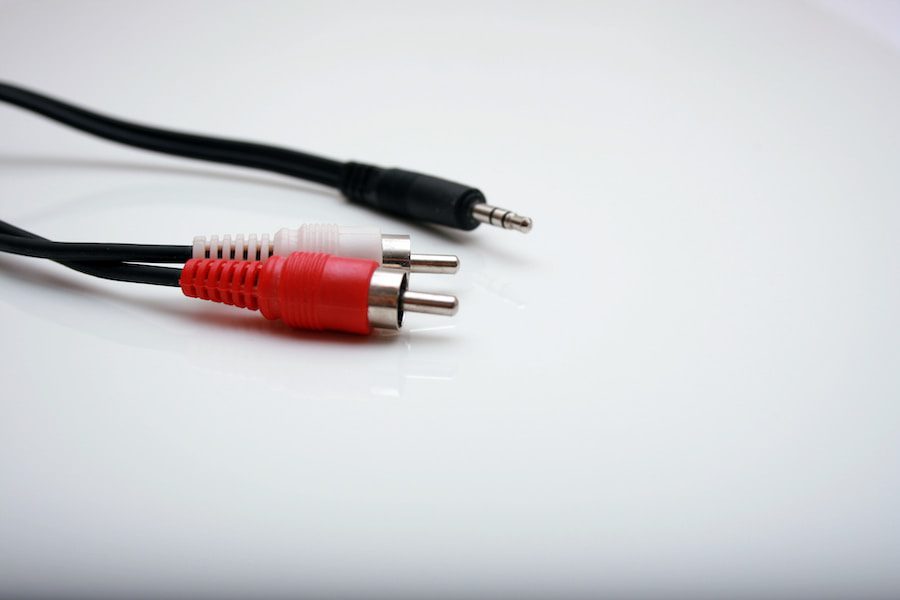
AUX cords typically come with a 3.5mm plug, which is ideal for modern devices, but some older or more specialized equipment may necessitate red and white RCA connectors. These connectors provide a simple and easy way to connect analog audio signals from a device to a speaker or other sound system. The red connector is typically used for the right audio channel, while the white connector represents the left. In a stereo setup, the two channels combine to create a balanced and immersive sound experience.
When creating an AUX cord with red and white connectors, it is crucial to ensure the connections are correctly assigned. The Tom’s Guide Forum suggests that the red connector should be connected to the right plus channel and the white connector to the left plus channel. The common ground or negative wire should be connected to both the right and left channels, creating a complete circuit for the analog audio signal.
Overall, understanding the basics of AUX cords and how they function with red and white connectors can help you create a reliable and high-quality audio connection that best suits your needs.
Preparation
Stripping the Wires
Before creating your own AUX cord with red and white connectors, you must strip the insulation off the ends of the wires. Start by cutting a suitable length of wire for your project. Next, carefully remove about half an inch (1.25 cm) of insulation from each end of the wire. For this task, you can use a wire-stripping tool or a sharp knife, being cautious not to cut or damage the underlying metal strands.
Identifying the Channels
After stripping the wires, you must identify the channels they represent. The red wire is usually associated with the right channel, while the white wire represents the left channel. There is usually a third wire, which serves as the ground or common connection.
In some situations, the wires may have different colors; therefore, it’s essential to consult the manufacturer’s documentation or look at the unit to identify the correct wiring. For instance, an aux cable could have red for the right channel, white for the left channel, and a silver wire as the common ground.
After identifying the channels, you can proceed to the next step in making your AUX cord, such as connecting the wires to the corresponding connectors or soldering them together. Following each step carefully and ensuring the wires are correctly connected, you can create a functional AUX cord that meets your needs.
Soldering the Wires
Soldering the wires to create an AUX cord with red and white ends requires a soldering iron and a steady hand. This section will walk you through soldering and connecting the red and white wires to the appropriate terminals.
Using a Soldering Iron
First, ensure your soldering iron is adequately heated and ready for use. Hold the soldering iron like a pen, ensuring a secure grip. Touch the solder to the tip of the iron to create a small pool of molten solder. This will connect the wires to the terminals on the connectors.
Next, prepare the wires. Using a wire stripper, strip the insulation from the ends of the red and white wires, exposing about 1/2 inch (1.27cm) of the bare wire.
Connecting the Red and White Wires
With the wires prepared, it’s time to connect them to the AUX connectors. To do this, follow these steps:
- Insert the stripped end of the red wire into the connector marked with a red band or symbol. Ensure that the bare wire contacts the metal terminal inside the connector.
- Touch the soldering iron to the joint where the red wire and terminal meet, briefly heating the wire and terminal. Then, touch the solder to the joint, allowing the solder to flow and create a secure bond.
- Repeat this process with the white wire, connecting it to the connector marked with a white band or symbol.
- Allow the solder to cool and harden before handling the connections.
Once you have connected the red and white wires, your AUX cord is ready for use. Follow these steps carefully to ensure a secure, stable connection that will provide optimal audio quality.
Testing the Connection
Once you have created your AUX cord with red and white wires, it is essential to test its connection to ensure its proper functioning. This section covers the steps to test the connection using a sound source and checking for interference.
Using a Sound Source
1. Connect the AUX cord to your audio device, such as a smartphone or an MP3 player. Ensure the red and white wires are connected to their respective channels (red for the right and white for the left).
2. Plug the AUX cord into the input of another audio device, such as a speaker or a sound system. Ensure the devices are powered on, and the volume levels are set appropriately.
3. Play a test track on the audio source to confirm the connection. If you can hear the sound from both channels (left and right), the AUX cord functions correctly.
Checking for Interference
1. While playing the test track, move the AUX cord and the connected devices to identify any possible interference. If you hear any crackling, popping, or sound loss, it may indicate a loose connection or a damaged wire.
2. Inspect the wires and connections for any signs of damage or frayed cables. You may need to redo the connections or replace the damaged parts if you find any issues.
3. Test the connection again after addressing any potential issues to ensure the problem is resolved. Remember, a stable connection with minimal interference is essential for an optimal audio experience.
Following these steps, you can ensure that your AUX cord with red and white wires appropriately functions and provides an excellent audio connection.
Tips and Safety Measures
Before embarking on the process of making an AUX cord with red and white connections, be sure to familiarize yourself with basic soldering techniques and safety precautions. Proper use of a soldering iron is essential for a successful AUX cord creation and maintaining personal safety.
While working with a soldering iron, always use a proper soldering stand and ensure proper ventilation to avoid inhaling fumes from the solder. Never touch the hot metal tip; always hold the soldering iron by its insulated handle.
Before starting the connection process, it can be helpful to use a multimeter to test the continuity and resistance of the wires. This will ensure that you are connecting the correct wires and that they are functioning correctly.
When connecting the wires, make sure to connect all corresponding colors to each corresponding color on each side: red to red and white to white. Optionally, shrink tubing can insulate and secure the connections, ensuring a more durable and lasting AUX cord.
Keep your work area organized and clutter-free to avoid accidents, such as tripping on wires or accidentally coming into contact with a hot soldering iron. Additionally, always unplug and store an unused soldering iron, and keep it away from flammable materials.
Conclusion
This article discusses creating a custom AUX cord using red and white wires. By following the suggested steps for cutting, stripping, and connecting the wires, anyone can create their own AUX cord tailored to their specific needs.
Use appropriate tools, such as wire strippers, and follow the proper steps to ensure a secure and efficient connection between the wires. This DIY project benefits those requiring a specific length or design for their audio connection needs.
By creating your own AUX cord, you can have better control over its quality, personalize its appearance, and save money compared to purchasing a commercially available cable. Additionally, learning such skills can be valuable in addressing other wire connection tasks in the future.

- Review of the ALABS IRON MINI-WL: A Powerhouse Wireless Microphone - October 4, 2023
- What is a Saturator in Music Production: A Brief Explanation - May 11, 2023
- What Are Rotary DJ Mixers? An Overview - May 11, 2023
SoundStudiomagic.com is a participant in the Amazon Services LLC Associates Program, an affiliate advertising program designed to provide a means for sites to earn advertising fees by advertising and linking to Amazon.com. We also participate in other affiliate programs which compensate us for referring traffic.