
An effects loop is crucial in many guitar amplifiers and effects pedals, allowing musicians to achieve a wide range of desired tones. It allows users to insert additional effects between their instrument’s preamp and power amp sections, ensuring a clean and detailed sound.
An effects loop is a series of send and return connections in a guitar amplifier or effects switching system. It is a dedicated path for audio signals, enabling guitarists to insert effects such as delays, reverb, and modulation into the signal chain without interfering with the amplifier’s preamp and power amp sections.
Although not all amplifiers and effects units incorporate an effects loop, those who frequently use a wide range of effects may find it an essential part of their sound management toolkit. Musicians who invest the time and energy into understanding and utilizing an effects loop can craft more versatile and refined tones from their gear.
Table of Contents
- Understanding Effects Loops
- Types of Effects Loops
- Setting Up Your Effects Loop
- Common Effects in the Loop
- Troubleshooting Effects Loop Issues
Understanding Effects Loops
Effects loops play an essential role in shaping guitar tones, allowing musicians to experiment with different combinations of effects to create their unique sound. This section aims to deepen your understanding of effects loops and their relationship to signal chains.
What is an Effects Loop?
Understanding the concept of an effects loop can improve a musician’s ability to tailor their sound to specific needs. Providing a designated signal path for external effects ensures that each effect’s unique characteristics are preserved and that distortion or tonal imbalance does not detract from the intended outcome.
Integrating an effects loop into your setup has numerous benefits. It minimizes noise by preventing high-gain effects from amplifying unwanted sounds, and it preserves the overall tone by incorporating certain effects after the preamp stage. Moreover, effects loops can optimize the audio signal by facilitating proper gain staging and ensuring a cleaner, more transparent tone.
Signal Chain Basics
The guitar signal chain refers to the path your guitar’s audio signal follows through various effects and amplifier settings. It begins when the signal leaves the guitar and ends at the speaker. Understanding the basics of signal chains is crucial in determining where to place effects within an effects loop for optimal results.
Common components of a signal chain include:
- Dynamic effects: These effects, such as compressors and noise gates, should be placed at the beginning of the signal chain to manage volume fluctuations and unwanted noise.
- Filters and EQs: Effects like wah-wah and equalizers are often best positioned early in the chain to shape the tone before other effects further process it.
- Distortion and overdrive effects: These effects add harmonic content and color the signal, so their position in the chain impacts the overall tone.
- Modulation effects: Chorus, flange, and phaser effects should be placed later in the signal chain or within the effects loop for a more natural sound.
- Time-based effects: Delays and reverbs usually work best in the effects loop, after the preamp and before the power amp, to prevent muddiness or signal degradation.
Experimenting with the arrangement of these effects in your signal chain and effects loop will allow you to fine-tune your sound and achieve your desired tone.
Types of Effects Loops
An effects loop is a signal-routing feature in many instruments and audio devices. It enables the insertion of signal processors, such as effects pedals or rack units, into the signal path of the instrument or device. There are two main types of effects loops: Series Effects Loops and Parallel Effects Loops. Each type has its own advantages and specific applications.
Series Effects Loops
In a series effects loop, the entire signal from the instrument or device is sent through the effects processor before returning to the signal path. This means the processed signal is completely mixed with the dry, unprocessed signal. This type of loop is often used when a single effect or chain of effects is desired to be applied to the entire signal.
- Advantages: Simple to set up and use; suitable when the entire signal needs processing.
- Disadvantages: Less flexibility; may not be ideal for subtle effects or when multiple effects are desired on different signal parts.
Parallel Effects Loops
With a parallel effects loop, the original dry signal remains untouched in the signal path while a portion of it is sent to the effects processor. The processed signal is mixed with the dry signal at the output stage. With this approach, it is possible to apply different effects to different signal parts and control the blend between the processed and dry signals.
| Advantages | Disadvantages |
|---|---|
| Greater flexibility; suitable for complex and subtle effects configurations | Can be more complicated to set up and limited by the mixer’s capabilities or device for blending signals. |
Both series and parallel effects loops have their unique benefits and applications. Choosing the right type of effects loop depends on the desired effect and the user’s specific needs.
Setting Up Your Effects Loop
Setting up an effects loop can greatly enhance your guitar tone and allow for better control over your pedal effects. This section will guide you through the steps to properly configure your effects loop, including connecting your pedals or processors and determining the optimal loop configuration.
Connecting Your Pedals or Processors
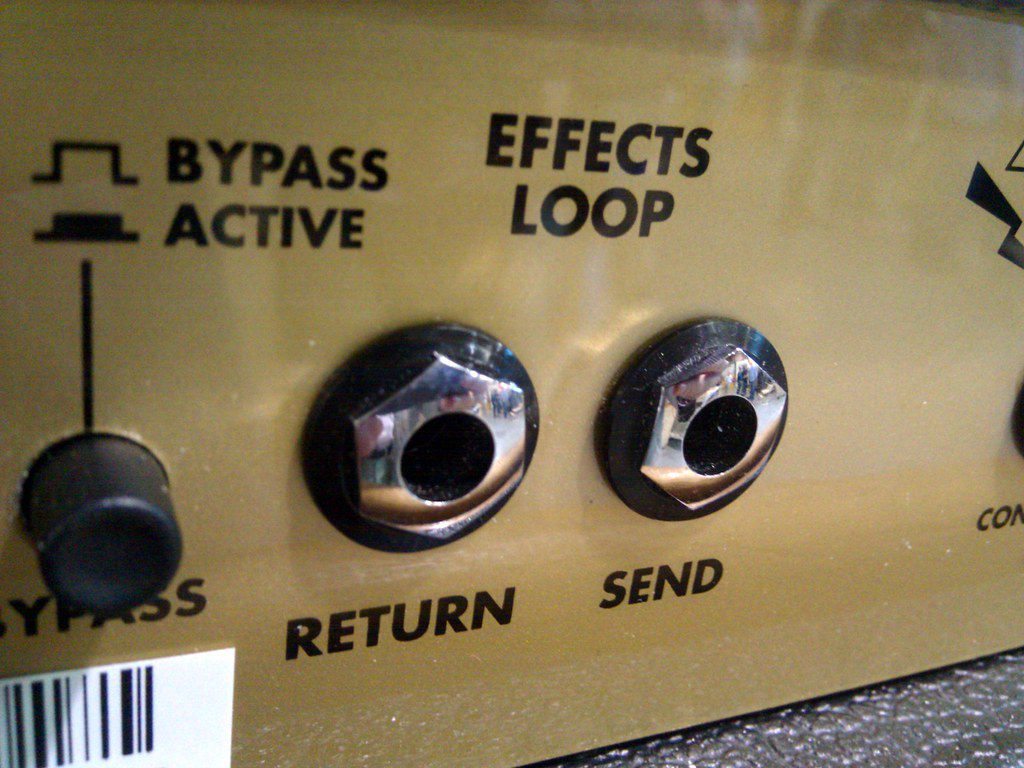
First, you must identify the send and return jacks on your amplifier. These are typically located on the back panel and labeled “FX Send” and “FX Return” or something similar. Once you have located these jacks, follow the steps below:
- Connect the “FX Send” jack on your amplifier to the input of your first effects pedal or processor using an instrument cable.
- Connect the output of your last effects pedal or processor to the “FX Return” jack on your amplifier using another instrument cable.
- For additional pedals or processors, connect them in series, with the output of one device going to the input of the next device in your chain.
Ensure that all connections are secure and that your devices are powered by batteries or an external power supply where applicable.
Optimal Loop Configuration
The order in which you place your effects pedals or processors in the loop can significantly impact your guitar tone. While there is no strict rule when it comes to the sequence, the following guidelines may help you to achieve the desired sound:
- Place time-based effects, such as delays and reverbs, towards the end of the loop. This allows the processed signal to blend naturally with your dry guitar tone.
- Modulation effects, such as chorus and flanger, can be placed towards the middle of the loop to add depth and color to your sound.
- Keep gain-based effects, such as overdrives and distortion pedals, closer to the beginning of the loop to maintain the clarity and definition of your core tone.
Experimentation is key when optimizing your effects loop configuration, so do not hesitate to try different arrangements until you find the best setup for you and your specific needs.
Common Effects in the Loop
An effects loop is an important part of an electric guitarist’s signal chain, allowing them to insert specific effects between a guitar amplifier’s preamp and power amp sections. This article will discuss some common effects that are typically placed in an effects loop, organized into time-based and modulation effects sub-sections.
Time-Based Effects
Time-based effects, as the name suggests, alter the guitar signal by manipulating the sound’s timing, duration, or decay. Some of the most common time-based effects utilized in an effects loop include:
- Delay: Produces multiple echoes of the original signal, with adjustable delay times and feedback levels.
- Reverb: Simulates the natural sound reflections and decay characteristics of different acoustic spaces, like rooms, halls, or chambers.
- Looper: Records a section of the guitar performance and plays it back in a continuous loop, allowing for the creation of intricate arrangements or accompaniment for practicing purposes.
Modulation Effects
Modulation effects introduce periodic variations to the guitar signal, adding the perception of movement, depth, or complex harmonic content. Some of the most common modulation effects used in an effects loop include:
- Chorus: Mixes the original signal with a slightly delayed and pitch-modulated copy, creating the illusion of multiple voices playing the same part.
- Flanger: Uses short, changing delay times and feedback to create sweeping harmonic interactions, often described as a “jet plane” or “whoosh” sound.
- Phaser: Combines the original signal with a phase-shifted copy, creating alternating peaks and troughs in the frequency response for a swirling, “phase-y” quality.
- Tremolo: Periodically modulates the signal’s volume, creating a pulsing, “throbbing” effect.
- Vibrato: Modulates the signal’s pitch, adding a slight wobble or “vibrato” reminiscent of a singer’s natural pitch fluctuations.
By smartly incorporating time-based and modulation effects in an effects loop, guitarists can greatly enhance their sonic palette and create various musical textures, atmospheres, and dynamic experiences.
Troubleshooting Effects Loop Issues
Understanding and addressing potential problems in your effects loop can optimize your sound and overall performance. This section will cover some common issues and provide advice on troubleshooting them.
Eliminating Signal Problems
Signal loss or degradation can occur in effect loops due to numerous factors, such as cable quality, connection issues, and faulty equipment. To resolve these issues, consider the following steps:
- Check the cables and connections: Ensure all connections are clean, secure, and functional. Replace any damaged or poor-quality cables, as they can significantly impact your signal.
- Test your effects pedals: Bypass each pedal individually to identify whether a specific pedal is causing signal issues or chain compatibility problems.
- Adopt a buffer pedal: A buffer pedal can help maintain signal strength and tone quality by converting the signal from high to low impedance. This can be particularly useful for long cable runs or complex effects chains.
Dealing with Noise
Excess noise, such as a hum or hiss, can often arise using an effects loop. To minimize noise, consider the following techniques:
- Use quality power supplies: A reliable power supply can help minimize noise issues caused by electrical interference. Isolated supplies and power conditioners are effective options for a cleaner signal chain.
- Opt for lower-gain settings: Higher gain settings on your pedals or amplifier can amplify noise, so opt for lower-gain settings whenever possible.
- Incorporate a noise gate pedal: A noise gate pedal can help eliminate unwanted noise by detecting the signal levels and cutting off the sound below a specific threshold.
By following these troubleshooting tips, you can effectively identify and address common effects loop issues, ensuring optimal sound quality and performance.

- Review of the ALABS IRON MINI-WL: A Powerhouse Wireless Microphone - October 4, 2023
- What is a Saturator in Music Production: A Brief Explanation - May 11, 2023
- What Are Rotary DJ Mixers? An Overview - May 11, 2023
SoundStudiomagic.com is a participant in the Amazon Services LLC Associates Program, an affiliate advertising program designed to provide a means for sites to earn advertising fees by advertising and linking to Amazon.com. We also participate in other affiliate programs which compensate us for referring traffic.