
A digital audio workstation (DAW) is integral in creating professional-sounding tracks in music production and audio engineering. One essential aspect of this process is outboard compressors, which help control the dynamics of audio signals. This article will introduce the topic of using a DAW outboard compressor and how it can enhance your music production skills.
An outboard compressor is a hardware device that processes audio signals independently of the software-based plugins within a DAW. It is typically connected to the audio interface or mixing console and functions as an external effect. This setup brings the warmth and character of analog gear, which many producers and engineers find desirable when crafting their sound.
To begin using a DAW outboard compressor, it is crucial to understand its functions, parameters, and proper connections. This includes knowledge of threshold, ratio, attack, release, and other settings that influence the dynamic processing of audio signals. Once these elements are mastered, users can effectively apply outboard compression to their mixes, producing a polished sound that meets industry standards.
Table of Contents
- What is a DAW Outboard Compressor?
- Connecting Outboard Compressor to DAW
- Setting Compression Parameters
- Parallel Compression
- Monitoring and Metering
- Closing Thoughts on How to Use a DAW Outboard Compressor
What is a DAW Outboard Compressor?
A DAW (Digital Audio Workstation) outboard compressor is a hardware audio processing device used in conjunction with or as an extension of a digital audio workstation. It is designed to manage the dynamic range of audio signals by reducing the volume of loud sounds and amplifying quieter ones.
The primary function of an outboard compressor is to ensure a balanced audio level, maintaining a consistent volume throughout a mix. This can greatly improve the clarity and impact of the audio, particularly in music production and broadcasting. Outboard compressors come in various forms, including analog and digital models, offering distinct characteristics to suit different audio applications.
Some key components of an outboard compressor are:
- Threshold: Determines the level at which the compressor starts to act on the audio signal.
- Ratio: Controls the amount of compression applied once the threshold is exceeded.
- Attack: Sets how quickly the compression takes effect after surpassing the threshold.
- Release: Regulates the time it takes for compression to stop when the signal falls below the threshold.
Outboard compressors can be used in various stages of the production process, such as recording, mixing, and mastering. By connecting an outboard compressor to a DAW, users can harness the dynamic control and distinctive sound qualities of hardware compressors while utilizing digital audio workstations’ flexibility and convenience.
Connecting Outboard Compressor to DAW
Using an outboard compressor with your DAW can significantly enhance the sound of your recordings. To properly connect an outboard compressor, follow these steps:
Analog to Digital Converter
An Analog-to-Digital Converter (ADC) is an essential piece of equipment for connecting an outboard compressor to a DAW. The ADC is responsible for converting the analog signals from the compressor into digital signals that the DAW can process. Choose an interface with a high-quality ADC to ensure the best sound quality.
I/O Setup
Next, you must configure your DAW’s input and output (I/O) settings. This will allow the DAW to send audio signals to the outboard compressor and receive the processed signals. First, connect the output of your DAW’s audio interface to the input of the outboard compressor. Then, connect the compressor’s output to an input on your interface. Your DAW’s I/O settings should be configured as follows:
- DAW output: Interface output channel
- Compressor input: Interface output channel
- Compressor output: Interface input channel
- DAW input: Interface input channel
Send and Return Routing
With the I/O settings properly configured, you can set up send and return routing in your DAW. This is routing audio signals from your DAW to the outboard compressor and back. Use an aux send from your track to send the audio signal to the compressor while allowing the original, uncompressed signal to be heard alongside the compressed one.
To set up send and return routing in your DAW, follow these steps:
- Create an auxiliary track and assign its input to the interface input channel.
- Route the auxiliary track’s output to your main mix bus or a specific destination, like a subgroup.
- Create an aux send on the track you wish to compress and assign its output to the interface output channel.
- Adjust the aux send level to control the compression applied to the original signal.
Following these steps, your outboard compressor is properly connected and integrated into your DAW’s workflow. You can now use the compressor to manipulate audio tracks, achieving professional results.
Setting Compression Parameters
Using a DAW outboard compressor properly requires understanding and setting the main parameters, including threshold and ratio, attack and release times, and gain reduction and make-up gain. This section outlines how to adjust these parameters to achieve desired compression effects.
Threshold and Ratio
The threshold and ratio parameters determine the level at which the compressor starts working and how much compression is applied. To set these parameters:
- Adjust the threshold knob or slider to set the input level where compression will begin.
- Set the ratio control to determine the amount of compression applied once the threshold is exceeded. A higher ratio produces more aggressive compression, while a lower ratio provides gentle leveling.
Attack and Release Times
Attack and release times control how quickly the compressor reacts to changes in the input signal and releases the compression. Here’s how to set these parameters:
- Adjust the attack time to control how quickly the compressor responds to the input signal exceeding the threshold. Faster attack times provide more immediate compression, while slower times allow transient peaks to pass through for a more dynamic response.
- Set the release time to determine how quickly the compression effect stops after the input signal falls below the threshold. Longer release times can smooth out the sound, while shorter times provide more agility to the compression.
Gain Reduction and Make-Up Gain
Monitoring gain reduction and setting make-up gain help balance the output level and maintain perceived loudness. Follow these steps to set these parameters:
- Observe the gain reduction meter to see how much the compressor reduces the input signal’s gain. This helps you gauge how aggressively the compressor is working.
- Adjust the make-up gain control to compensate for the overall gain reduction. This restores the perceived loudness of the audio signal and maintains a balanced output level.
Parallel Compression
Parallel compression is a technique used in audio processing to blend a compressed signal with the original, uncompressed signal. This method offers increased control over the balance of dynamic range and overall loudness in a mix.
To utilize parallel compression in a digital audio workstation (DAW) with an outboard compressor, follow these steps:
- Create a send to route the audio signal from the original track to an auxiliary channel.
- Connect the outboard compressor to the auxiliary channel’s input and adjust the input and output gain accordingly.
- Set the compressor’s parameters, such as threshold, ratio, attack, and release, to achieve the desired compression effect.
- Blend the compressed auxiliary channel with the original, uncompressed track using the channel faders or balance controls for a balanced mix.
Parallel compression is particularly popular for treating drums, vocals, and other instruments that require a controlled dynamic range while preserving their natural character. It offers several benefits such as increased clarity, punch, and potentially avoiding over-compression of the audio signal.
Monitoring and Metering
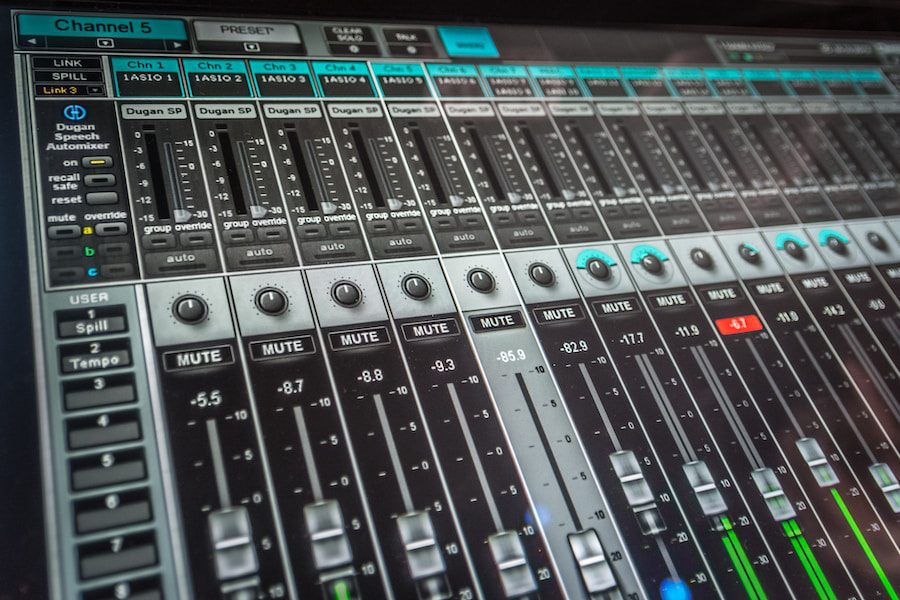
A crucial aspect of effectively using a DAW outboard compressor is understanding how to monitor and meter the compression process. Monitoring refers to listening to the sound signal as it passes through the compressor. At the same time, metering involves using visual tools, such as LED or VU meters, to measure the compression effect on the audio signal.
Most outboard compressors have built-in meters that showcase compression levels for gain reduction. This information is vital for correctly adjusting compression settings to achieve the desired sound. When using a DAW outboard compressor, users should carefully observe and respond to these metered measurements while adjusting parameters such as threshold, ratio, attack, release, and makeup gain.
While working with compressors, relying on both listening and monitoring techniques is essential for the best results. A common workflow might involve:
- Adjusting compression parameters while watching the gain reduction meter to understand how the compressor affects the audio signal.
- Switching between bypass and active compression modes to compare the results and ensure that the compression settings achieve the desired sound.
- Use high-quality monitoring equipment, such as studio-grade headphones or monitors, to represent the compressed audio accurately.
- Testing the final mix in various listening environments to guarantee a well-rounded outcome.
Meticulously blending metering and monitoring techniques ensures the user can effectively manipulate the outboard compressor in their DAW and produce the desired results.
Closing Thoughts on How to Use a DAW Outboard Compressor
Using a DAW outboard compressor can greatly enhance the audio production experience. It enables producers to take advantage of the analog warmth and character often associated with hardware compression while maintaining the convenience and flexibility of a digital workflow.
When incorporating an outboard compressor into a DAW setup, it is crucial to understand the device’s capabilities and functionalities. This includes knowing how to connect the equipment properly and being familiar with various settings such as threshold, ratio, attack, and release.
When applying compression, producers should strive for a balanced and natural sound. This is achieved through careful consideration of the compressor’s settings and regular critical listening to the audio material. Experimentation is key – try different settings, and trust your ears to guide you toward a professional-sounding result.
Accommodating a hardware compressor within a DAW environment requires knowledge, practice, and patience. With time and attention, producers can benefit from the best of both worlds – the unique characteristics of hardware compression, complemented by the immense flexibility of a digital audio workstation.

- Review of the ALABS IRON MINI-WL: A Powerhouse Wireless Microphone - October 4, 2023
- What is a Saturator in Music Production: A Brief Explanation - May 11, 2023
- What Are Rotary DJ Mixers? An Overview - May 11, 2023
SoundStudiomagic.com is a participant in the Amazon Services LLC Associates Program, an affiliate advertising program designed to provide a means for sites to earn advertising fees by advertising and linking to Amazon.com. We also participate in other affiliate programs which compensate us for referring traffic.