
After listening back to my voice-over narration, I realized that I was popping my P’s into the mic creating an ungodly booming sound at the beginning of those p-words. Those booming sounds are called plosives.
I thought the whole take was ruined. But alas, I discovered a way to minimize these plosives, or eliminate them altogether using software called Twisted Wave. There are many brands of Digital Audio Workstations (DAW) that can do this, but Twisted Wave is the one I use for removing plosives.
Table of Contents
- How do you get rid of plosives using Twisted Wave software?
- What is a Plosive?
- How to Prevent Plosives in the First Place
How do you get rid of plosives using Twisted Wave software?
To get rid of plosives using Twisted Wave, follow these steps:
- Use the cursor to select the plosive in the waveform.
- Use the Amplify function with a negative value:
- From the menu select Effects>Amplify.
- Set the value to -3 dB.
- Click Apply.
- Repeat as needed.
Here’s a quick video to walk you through the process of using Twisted Wave to remove plosives:
Now that you know how to remove a plosive in using Twisted Wave, Let’s take a moment to discuss exactly what it is that you just removed.
What is a Plosive?
First, let’s talk about what a plosive is.
A plosive is when a puff of wind (your breath) hits the diaphragm of the microphone and causes it to distort the diaphragm. The diaphragm is just a membrane that moves back and forth and that movement generates electrical energy that goes down the wire to the preamp and does all the little magical electronic things that it does.
That movement of the diaphragm: that is the electricity. And when you send breath from your mouth into the diaphragm of the large condenser microphone (it’s particularly bad with large-diaphragm condensers) it causes it to deform and it creates a very significant bass note.
A huge distortion that essentially ruins the take. That is a plosive.
If you send off audio that has plosives in it, 9 times out of ten it’s going to get rejected. Now, maybe there are some magical de-plosive-er VSTs (Virtual Studio Technologies) out there. I don’t have any. I’ve never used one. I dunno.
But, there are some editing techniques that you can use to minimize a plosive that exists if it’s an irreplaceable take. Like, if you captured an interview (and you can’t get that interview again) and there are plosives in there, you can try and hand edit them one by one, like we showed above.
But if you can get another take, do it using special microphone placement, or use a good pop filter.
How to Prevent Plosives in the First Place
The best position to be in when recording is to avoid the plosives in the first place. The are two solid ways to do this.
1. Use a Pop filter
Here we’re going to talk about pop filters. There are a couple of different kinds of Pop filters and we want to see: 1) what the different kinds are, and 2) their effectiveness. Are they effective at what their job is? And their job is to reduce plosives. Period. With a P.
Here is the thing about pop filters. They’re never going to stop 100% the wind.
If you try to beatbox into the mic, yeah, it’s going to make a plosive. I don’t care how good the pop filter is. I mean, chances are, 9 times out of 10, if you have even the most expensive pop filter and you deliberately pop into it, it’s going to distort.
Pop filters are not miracle workers, but they will help you with 90% of the cases.
The 3 Main Types of Pop Filters
There are three main types of pop filters to mention. I’ll go in order from least to most expensive.
Nylon pop filters
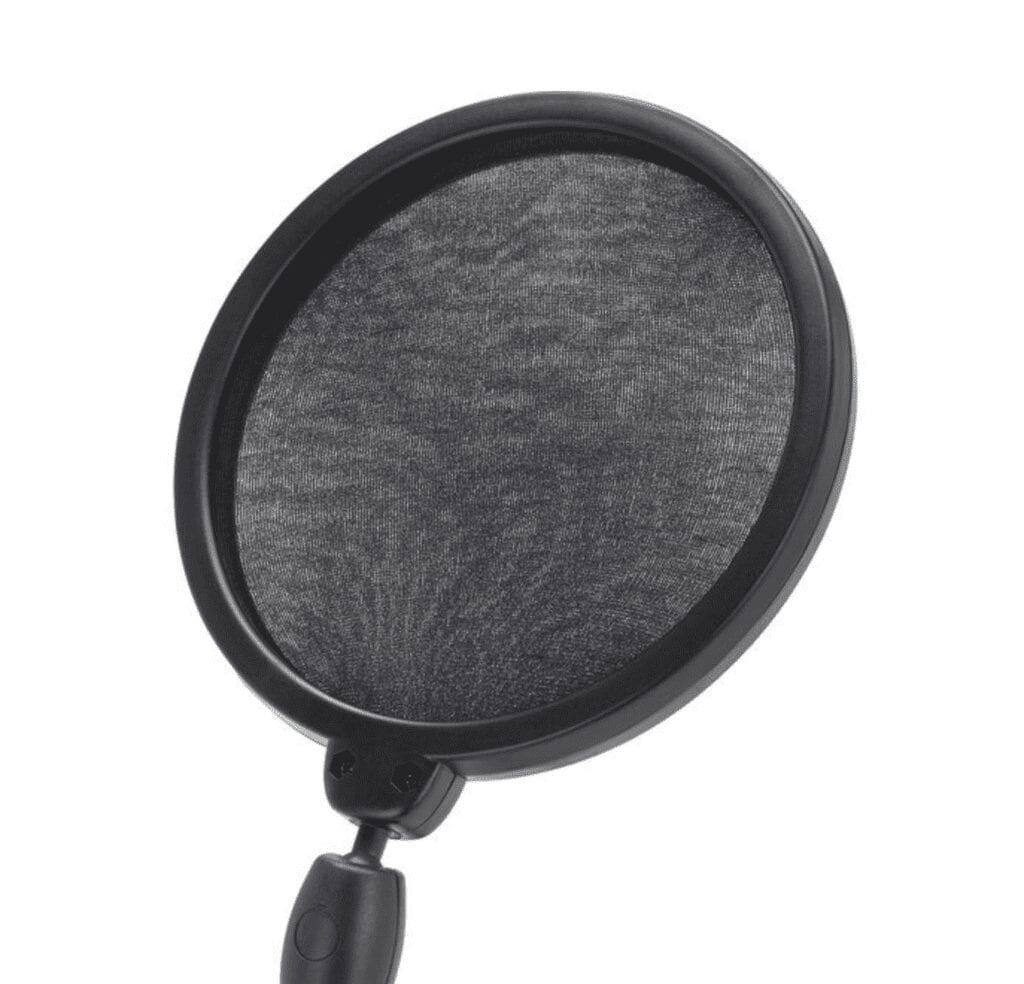
This is the inexpensive kind that you see all the time. It’s a round frame with a nylon fabric screen stretched in between that works by diffusion. This typically has two layers of nylon wrapped around a form with an edge around it.
You essentially just put it in front of the microphone and the first layer of nylon fabric diffuses the air. The fabric spreads the air out a bit before it hits the second layer of fabric which spreads the air out a little bit more.
The idea is to reduce the speed of the breath before it hits the diaphragm and to slow it down enough that it doesn’t deform the microphone diaphragm too badly.
These are readily available and usually cheap. Check the prices on Amazon here.
Mesh metal pop filters
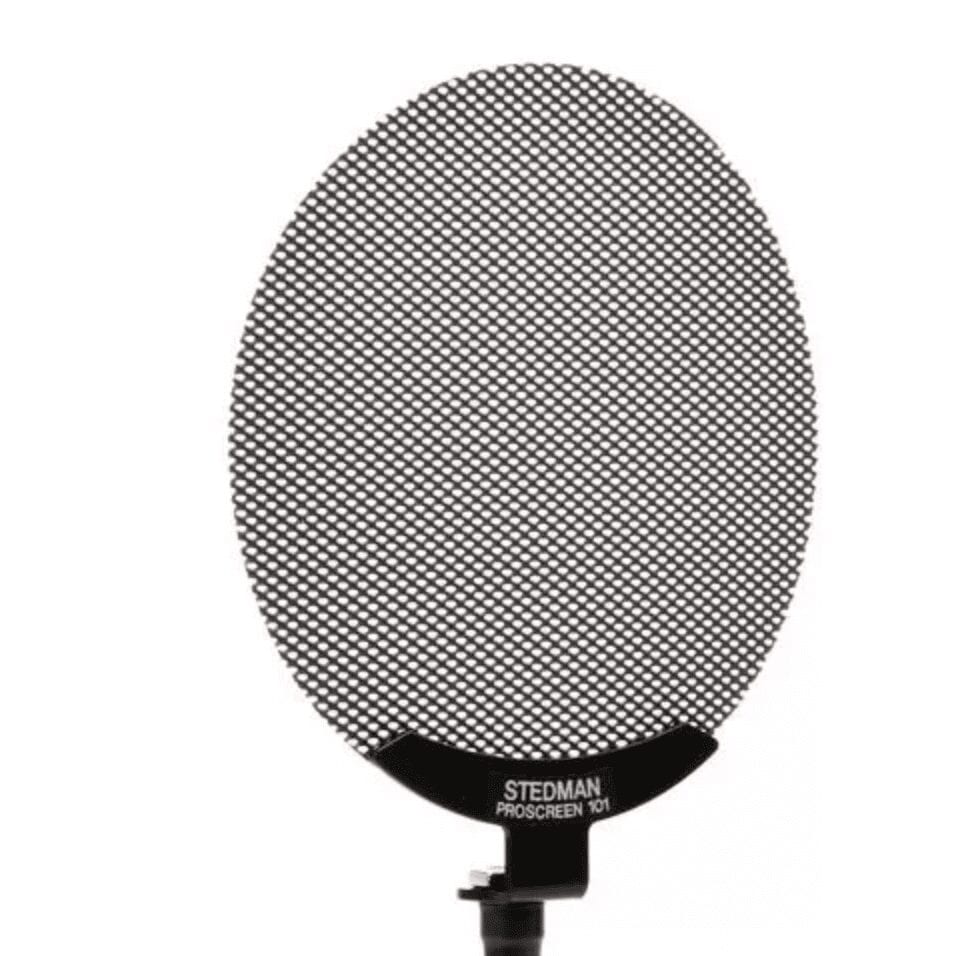
The mesh metal pop filter is a little more expensive. It’s a thin disc of metal with holes in it that are stamped in such a way that it has a very specific pattern.
The idea here is wind deflection, not diffusion.
The shape of the holes in the mesh changes the speed and direction of the air as it passes through the filter so that it is deflected away from the microphone.
The sound goes through and the wind gets deflected downward. So, if you blow into the microphone filter, you actually feel the air down below.
The air comes in and goes straight down, so that doesn’t get into the mic.
The sound, however, goes straight through to the mic.
Here’s the exact metal mesh filter I tested from Amazon: Stedman PS101.
Foam Wind Screen pop filters
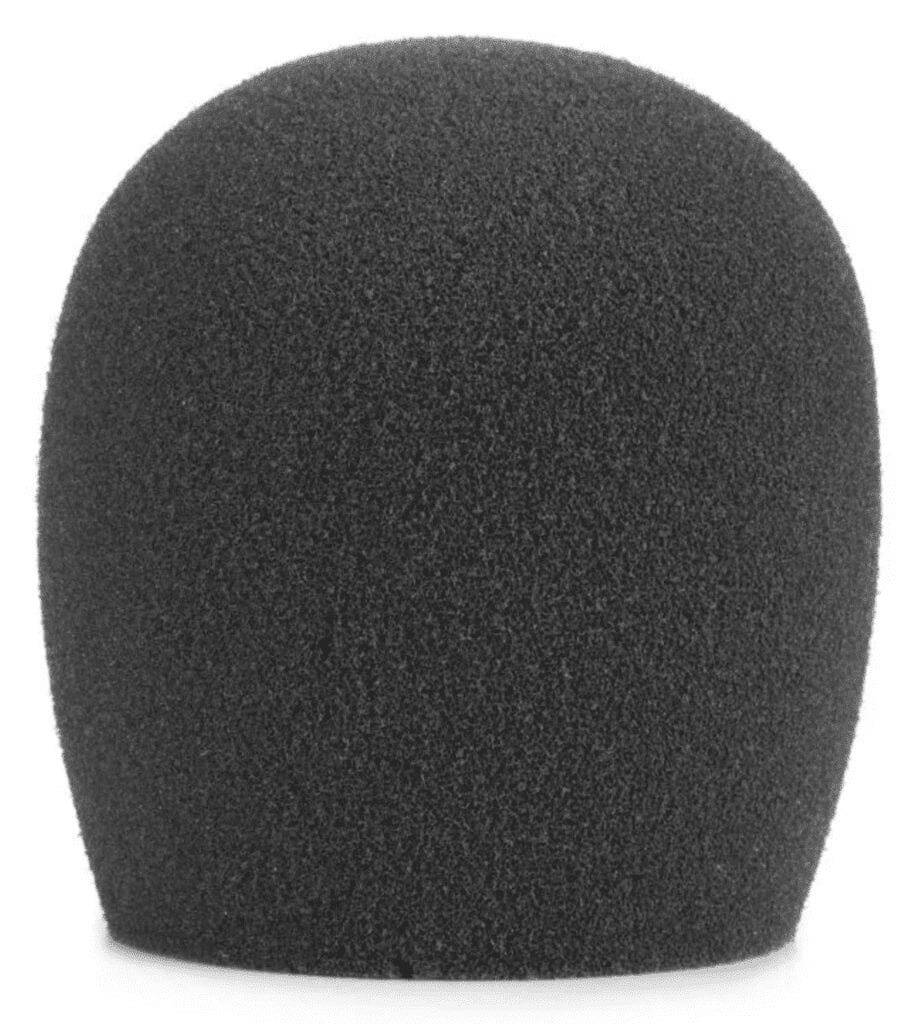
This is the foam squishy cover that goes over the head of a microphone.
It is usually a half-inch thick acoustically transparent foam . You slide on top of the microphone and the idea is to diffuse the air before it gets to the diagram, similar to a nylon pop filter.
However, this type covers the microphone from all directions and will be good for omnidirectional mics.
It will also be good for when you’re outside.
These type of filters are cheap and abundant. Check these prices and variety on Amazon.
2. Mic placement
The last thing that you can do is you can adjust the mic position. Aim the mic toward your mouth, not your mouth toward the mic.
“Aim the mic toward your mouth, not your mouth toward the mic.”
– Juan Louder
This one does work to a certain extent and, it’s not a panacea, it’s not magic, but if you take the microphone and angle it down and also angle it so that it’s about 45 degrees to your mouth, your breath will miss the mic diaphragm, and avoid the plosive.
This technique will change the EQ of the microphone a little bit, but now your voice is going past the microphone. You’re not sending air up towards the microphone.
The air that does reach the mic is deflected at an angle and much less (or no) deformation of the diaphragm occurs. This prevents a plosive.
As long as you’re within the sweet spot are of the cardioid pattern and you have a good cardioid microphone you should be able to get away with this. Just stay in the same spot and the sound will be consistent.
If you’re already creating Twisted Wave multi track recordings, then you’re in the right software to remove plosives if you get into this situation. Give twistedwave a try.

- Review of the ALABS IRON MINI-WL: A Powerhouse Wireless Microphone - October 4, 2023
- What is a Saturator in Music Production: A Brief Explanation - May 11, 2023
- What Are Rotary DJ Mixers? An Overview - May 11, 2023
SoundStudiomagic.com is a participant in the Amazon Services LLC Associates Program, an affiliate advertising program designed to provide a means for sites to earn advertising fees by advertising and linking to Amazon.com. We also participate in other affiliate programs which compensate us for referring traffic.