
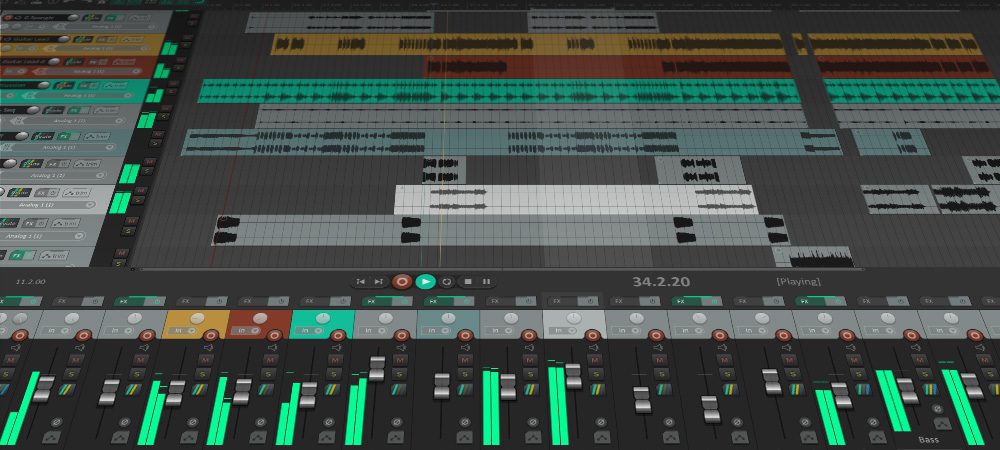
Reaper is a powerful digital audio workstation (DAW) that offers a wide range of audio editing and mixing capabilities. One essential aspect of producing professional-sounding music is the use of reverb effects. Reverb is an audio effect that simulates the natural reflections of sound in a physical space, adding depth and space to the audio mix.
In Reaper, users can access various reverb plugins that can be easily applied to individual tracks or the entire song. This article will explain how to add reverb to your projects in Reaper using built-in plugins, helping you achieve a professional and polished sound in your audio productions.
Table of Contents
- Understanding Reverb
- Installing Reverb Plugins in Reaper
- Applying Reverb to a Track
- Using Sends and Returns for Reverb
- Tips for Effective Reverb
- Conclusion
Understanding Reverb
Reverb, or reverberation, is the persistence of sound after it has been produced, resulting from the reflection of sound waves off surfaces like walls, ceilings, and floors. It creates a sense of space and depth in an audio mix, giving the listener an impression of the environment in which the sound occurs. In digital music production, reverb is crucial to enhance recordings’ overall sound quality and realism.
In Reaper, reverb effects can be added using built-in plugins such as ReaVerb or third-party plugins available for download. Depending on the desired outcome, these effects can be applied to individual tracks or the entire mix. When appropriately used, reverb can help create a more immersive and sonically pleasing experience for the listener, ensuring the final product is polished and professional.
There are several reverb algorithms, each with distinct qualities and characteristics. Some common types include spring, plate, hall, room, and convolution reverb.
The choice of reverb type depends on the specific sound one wants to achieve and the instruments or vocals used in the mix. For example, spring reverb may be more suited for guitars, while hall reverb might be better for orchestral music.
When applying reverb in Reaper, it is essential to consider factors such as the reverb time (decay), wet/dry mix, and pre-delay.
Reverb time refers to the duration for the reverb to fade away, while the wet/dry mix determines the balance between the original signal and the reverberated signal. Pre-delay is the gap between the original sound and the onset of the reverb effect. Adjusting these parameters can significantly impact the overall sound, so it’s crucial to experiment and find the right balance for the mix.
Installing Reverb Plugins in Reaper
Before adding reverb to your tracks in Reaper, you must install the appropriate plugins. Reverb plugins are essential for creating space and depth in your mix. Reaper comes with a built-in reverb plugin called ReaVerb. However, you can use third-party reverb plugins to achieve different reverb effects and characteristics. To install a new reverb plugin, follow the steps below:
First, download the reverb plugin that you want to use. Many free and paid reverb plugins are available online. Just ensure that the plugin is compatible with Reaper and your operating system. Once you have downloaded the plugin, extract any compressed files if necessary and make note of the folder location.
Next, open Reaper and go to the menu bar. Click on Options and then select Preferences from the dropdown menu. In the Preferences window, navigate to the Plug-ins section and click on VST.
In the VST settings, locate the VST plug-in paths section. Click the Add button and browse to the folder where you extracted or installed the reverb plugin. After selecting the appropriate folder, click OK and give Reaper a moment to scan for new plugins. Finally, click Apply in the Preferences window to save the changes and click OK to close the window.
Your new reverb plugin should now be available for use in Reaper. To access it, follow the process of adding reverb to a track, and choose the newly installed plugin from the list of available options.
Applying Reverb to a Track
Adding reverb to a track in Reaper can enhance your mix’s sense of space and depth. This section will guide you through applying reverb to a track with three sub-sections: Selecting the Track, Adding a Reverb Plugin, and Adjusting Reverb Parameters.
Selecting the Track
First, you must select the track you want to apply the reverb. In the Reaper session, click on the track header (the box containing the track name) to highlight it. This will indicate that it is the active track for applying effects or making edits.
Adding a Reverb Plugin
Once you have selected the desired track, click on the FX button in the track control panel located on the left side of the track interface. This will open the FX window containing all the available plugins and effects.
In the FX window, locate the search box next to the “Filter List” and type “reverb.” The list will then display all available reverb plugins within the software. Click on the desired reverb plugin to add it to the track.
Adjusting Reverb Parameters
After adding the reverb plugin, you will be presented with its interface, where you can modify various reverb parameters to shape the effect according to your preferences. Some standard parameters to adjust include:
- Pre-Delay: The time it takes for the first reflections to reach the listener’s ears. Adjusting this can help create a sense of depth and space in the mix.
- Decay Time: Determines how long the reverb tail lasts. Short decay times can make a track sound more intimate, while longer decay times create a more spacious and open effect.
- Wet/Dry Mix: Controls the balance between the dry (unprocessed) and wet (processed with reverb) signals. A higher wet mix will create a more prominent reverb effect, while a lower wet mix will result in a subtler effect.
Adjust the parameters until the desired reverb effect is achieved. Be cautious not to overuse reverb, as excessive amounts can lead to a muddy and unfocused mix. Once you are satisfied with the settings, close the plugin window, and the reverb will be applied to your track.
Using Sends and Returns for Reverb
When working with reverb in Reaper, one effective method involves using sends and returns. This approach allows for greater control over the dry and wet signals within a mix. The following tutorial will guide you through creating and utilizing sends and returns for reverb in Reaper.
Creating a Reverb Bus
First, create a dedicated reverb bus to host the reverb effect. This can be achieved by following these steps:
- Launch Reaper and open your project.
- Go to Track, then select “Insert New Track” to create a new track.
- Name the new track “Reverb Bus” or a similar title to distinguish it from other tracks in your project.
- Click the FX button on the “Reverb Bus” track, then add a reverb plugin and configure the settings as desired.
Creating a separate track for reverb allows for flexibility and control over the effect and easier processing of dry and wet signals.
Routing Tracks to the Reverb Bus
After creating the reverb bus, you must route the tracks that require reverb to the newly created bus. To do this, follow these steps:
- Select the track or tracks you want to send to the reverb bus.
- Click the “Route” button on the selected track(s).
- Click “Add New Send” in the routing window and choose the reverb bus as the destination track.
Rerouting tracks to the reverb bus ensures that the reverb effect is applied only to the desired tracks within your mix.
Balancing Dry and Wet Signals
Lastly, you must balance the dry and wet signals on the reverb bus. This involves adjusting the send levels of the tracks routed to the reverb bus and the wet/dry mix settings on the reverb plugin. To balance dry and wet signals, follow these steps:
- Adjust the send levels on each routed track until the desired amount of reverb is applied.
- Use the wet/dry mix settings on the reverb plugin to fine-tune the balance between the original signal and the reverb effect.
Balancing the dry and wet signals allows for precise control over the reverb effect within the mix, ensuring a professional and well-blended sound.
Tips for Effective Reverb
Choosing the Right Reverb Type
When adding reverb in Reaper, it’s essential to select the appropriate reverb type for the context of your mix. There are several types of reverb to choose from, such as room, hall, and plate reverbs. Each type differs in decay time and sonic characteristics, making them suitable for various musical settings.
For example, room reverbs create a smaller, more intimate space, ideal for drums or vocals. Hall reverbs offer a larger, more expansive orchestral or ambient music environment. Plate reverbs, on the other hand, provide a brighter, dense sound that can be applied to guitars or synths for added depth and dimension.
Managing Reverb Time and Size
Reverb time, or decay time, is a crucial parameter when applying reverb in Reaper. It controls how long it takes for the reverb to fade away after the initial sound source has stopped. Adjusting the reverb time according to the tempo and style of your music can enhance the mix’s clarity and dimension.
Reverb size refers to the perceived size of the virtual space created by the reverb. With the time parameter, you can shape the overall sound of the reverb. For instance, larger spaces would need more extended decay times, while smaller spaces would require shorter ones.
EQ and Reverb
Equalizing your reverb can prevent muddiness and build-up of unwanted frequencies in your mix. To achieve this, apply an EQ plugin to the reverb bus in Reaper. One helpful technique is to apply high-pass and low-pass filters to shape the reverb’s frequency spectrum. A high-pass filter can remove low-frequency content to avoid excessive buildup in the bass range, while a low-pass filter can control the brightness of the reverb tail by reducing high frequencies.
Another practical approach is to use complementary EQ adjustments for your reverberated and dry signals. This technique creates a clear separation between the two, preventing frequency masking and delivering a more transparent mix.
Conclusion
In summary, adding reverb to your tracks in Reaper can be achieved through a few simple steps. Start by finding the appropriate reverb plugin, such as ReaVerb, within the software’s selection of available effects.
Next, setting up a dedicated reverb bus is crucial to maintain control and flexibility over how the effect is applied to each track in your project. This allows for more efficient processing and enhances the overall mix quality.
When applying reverb, consider the context of the mix and the type best suited for the particular sound. Understanding the impact of reverb on different elements of a mix, such as drums, can help achieve the desired results.
As a producer or engineer, continually expanding your knowledge and experimenting with reverb settings will contribute to developing your mixing skills. Remember that practice and patience are vital in achieving the perfect balance and depth in your mixes.

- Review of the ALABS IRON MINI-WL: A Powerhouse Wireless Microphone - October 4, 2023
- What is a Saturator in Music Production: A Brief Explanation - May 11, 2023
- What Are Rotary DJ Mixers? An Overview - May 11, 2023
SoundStudiomagic.com is a participant in the Amazon Services LLC Associates Program, an affiliate advertising program designed to provide a means for sites to earn advertising fees by advertising and linking to Amazon.com. We also participate in other affiliate programs which compensate us for referring traffic.